Converting photos to powerpoint with lines and shading
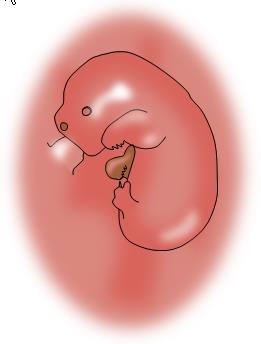
If you want to create drawings like the one to the right using a program you already know how to use, this tutorial may help you. Powerpoint is not ideal for this sort of drawing, but it is easier than Inkscape (free) or Adobe Illustrator (very expensive), since you already know how to drive powerpoint. No new user interface to learn, just a few tricks and tweaks to get the head around.
My tutorial will take you through the key steps in generating this illustration of a newborn wallaby attached to a teat in the pouch. I will show how to generate the base by tracing the outlines from a photo, and then how to embellish this with fills and shading to get a reasonably 3-D appearance.
Powerpoint may not be ideal for generating this sort of vector art (things drawn with lines and curves and shapes and shading), but it can get the job done with remarkably little fuss, and saves the very steep learning curve for Inkscape / Illustrator or the like.
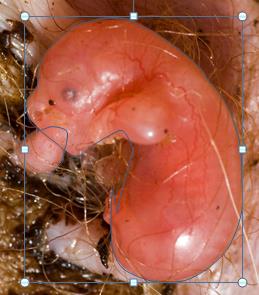
 Let’s start by placing a starting photograph onto a blank powerpoint page. Resize and crop to suit the page size. It is best to make the image as large as possible on the page as this gives you potential for finer resolution adjustments on your drawing.
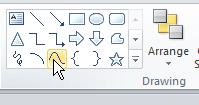
Now use the “curve” tool to draw the outline of the main blocks.
|
Note that I am drawing the outlines in a bluish colour. This is a colour that is not part of the photo so I can clearly distinguish the drawn lines. Later I will make the outlines black |
|
The colours selected were based on the original photo image, but I will tweak these shortly to get a more 3-D effect. As it is, this is a bit flat. Note that I have moved the outline of the animal’s right forelimb “backward” so that it lies under the body, and I have given it a slightly darker colour to simulate the shadow visible in the photo. This adds to the sense of depth.
|
|
The larger the number of pixels the softer the gradation is. The result if this setting is to turn the hard white shape into a soft white blob.
|
|
|
|
Move copy 2 and copy 3 to align with copy 1. |
|
Now we have a more 3-D effect on the body. Adjust the soft edges as needed (use Soft Edges Options for fine adjustments). Note in this figure I seem to have got the animal’s right forelimb over the body outline, but it is easy to select this paw and send to back to put it behind the body outline. And the animal’s left forelimb colouring ends with an ugly sharp cut off. over the newly shaded body. Easy to fix. Change the left forelimb fill to no fill. Now you will see there is a bit around the claws where there is no colour (so it looks white since the slide background is white), and this needs filling. We need to select the outline copy 1 (darker fill). This lies under outline copy 2, so select copy 2, and press shift-tab. This selects the shape next down in the hierarchy (tab selects the shape next up). Go to edit points. Add points and bend lines as needed to cover the bit of the claw that needs to be filled by the darker body colour. Now the whole paw is coloured with no sharp cutoff. |
 The arm looks a little flat, with little shading to suggest shape. The original photo had a highlight on the elbow. We can add a little shading as we did for the highlight under the eye. Add a lighter area on top of the arm, and a smaller highlight on the elbow using this technique. The arm looks a little flat, with little shading to suggest shape. The original photo had a highlight on the elbow. We can add a little shading as we did for the highlight under the eye. Add a lighter area on top of the arm, and a smaller highlight on the elbow using this technique. |
|
The figure now has more “shape”. The pouch skin looks a little flat though. Add a few irregular shapes with a slightly darker colour and a large Soft-edges pixel value to give a little texture to the pouch, and add a lighter highlight to the lower rump (there was one on the original photo), change any remaining blue outline lines to black, and you have the drawing that I started this tutorial with. I am sure you could improve this drawing. This was a quick one to illustrate the process for the purposes of this tutorial. Next time you want a nice 3-D looking drawing, try these approaches and see your drawing come to life. |